Groups lets you set up a group of clients who receive service as a group either one time or recurring. When you set up a group, you can also set up group service for the group you create.
From the Groups (####) list page, you can:
Add Group Service to the Group You Set Up
Follow this path: My Office > Groups/Day Services > Managing Groups.
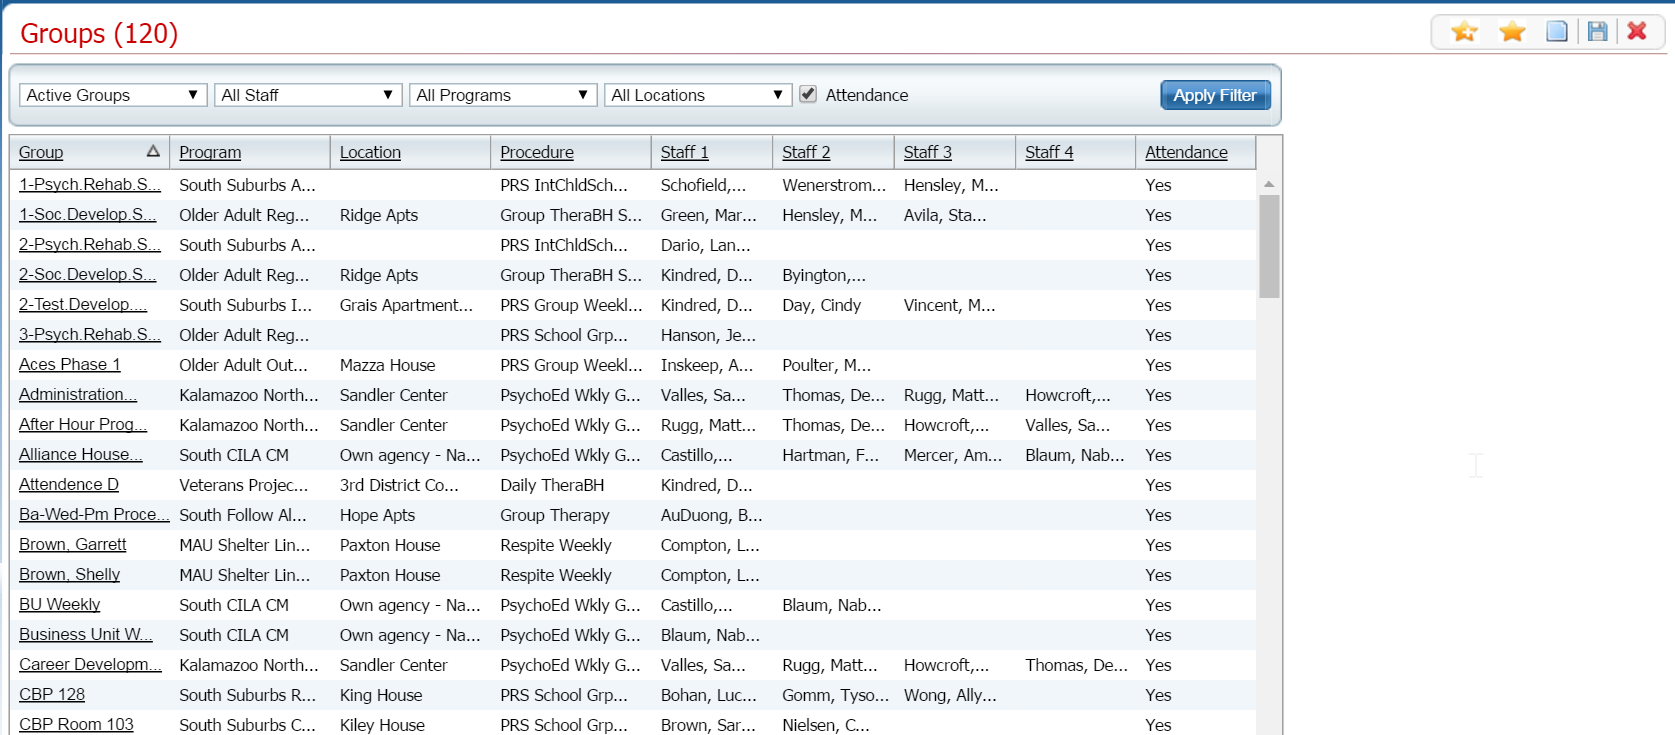
The Groups (###) list page is displayed. View field definitions.
Click the New ![]() item icon in the task bar.
item icon in the task bar.
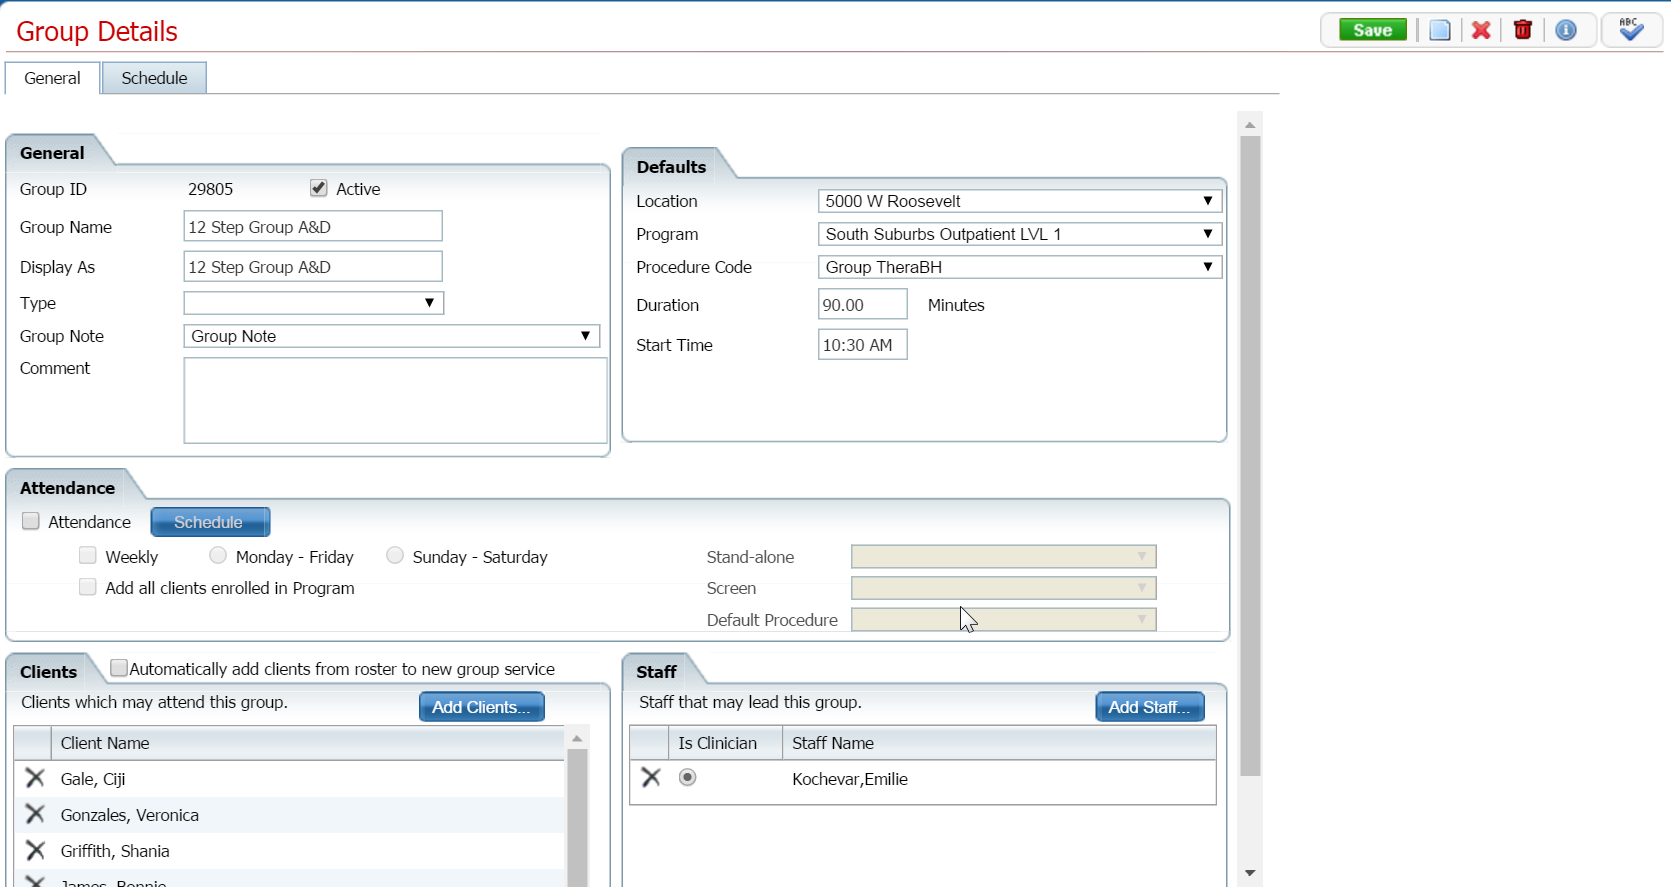
The Group Details page is displayed with the General tab active.

Complete the General tab. View field definitions.
Click the Save button in the task bar.
Note: If you selected the Attendance check box when you created the group, the Schedule tab is grayed out. If the Schedule tab is grayed out, click the Schedule button in the Attendance section on the General tab to set up the group service.
Click on the Schedule tab to make it active.
The Schedule tab is displayed.
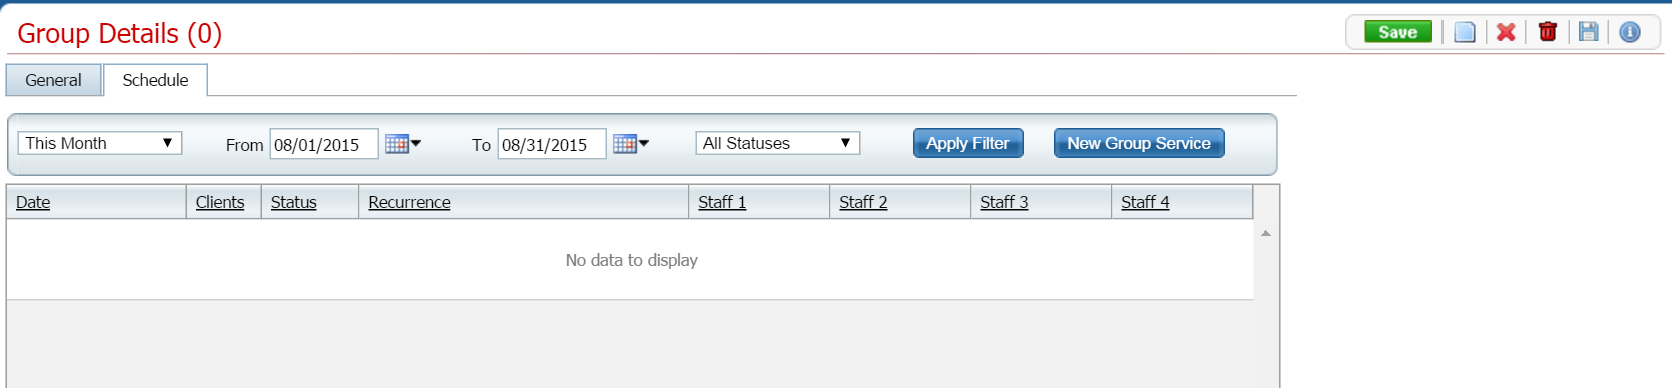
To create a new group service, click on the New Group Service ![]() button in the Filter section.
button in the Filter section.
The Group Service Clients window is displayed. The clients who were added to the group when it was set up are listed in the list section. Note to the right of the Clients heading is the name of the group.
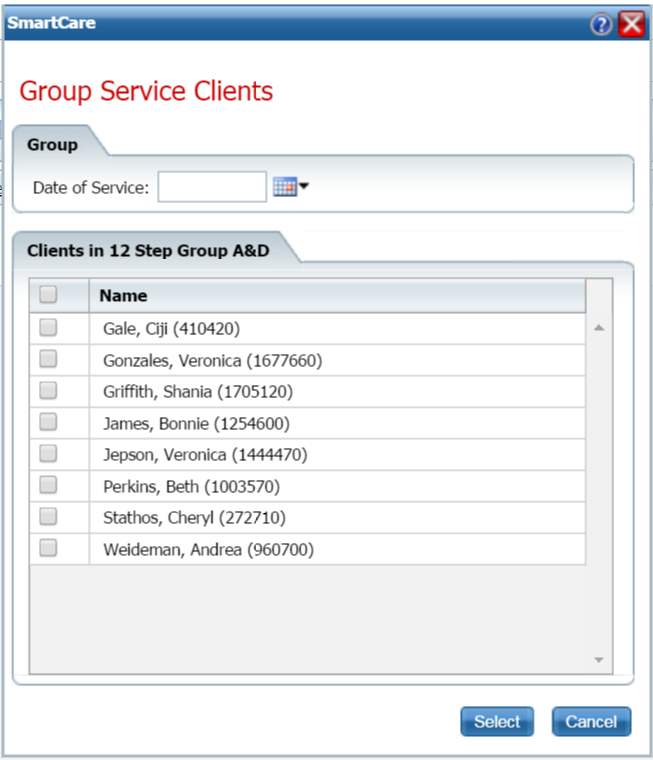
Select a date of service using the calendar icon for setting up the new group service.
Select the clients who will be part of the group service by clicking the check box to the left of the client's name. Click the check box next to the Name heading to select all listed clients.
Click the Select button.
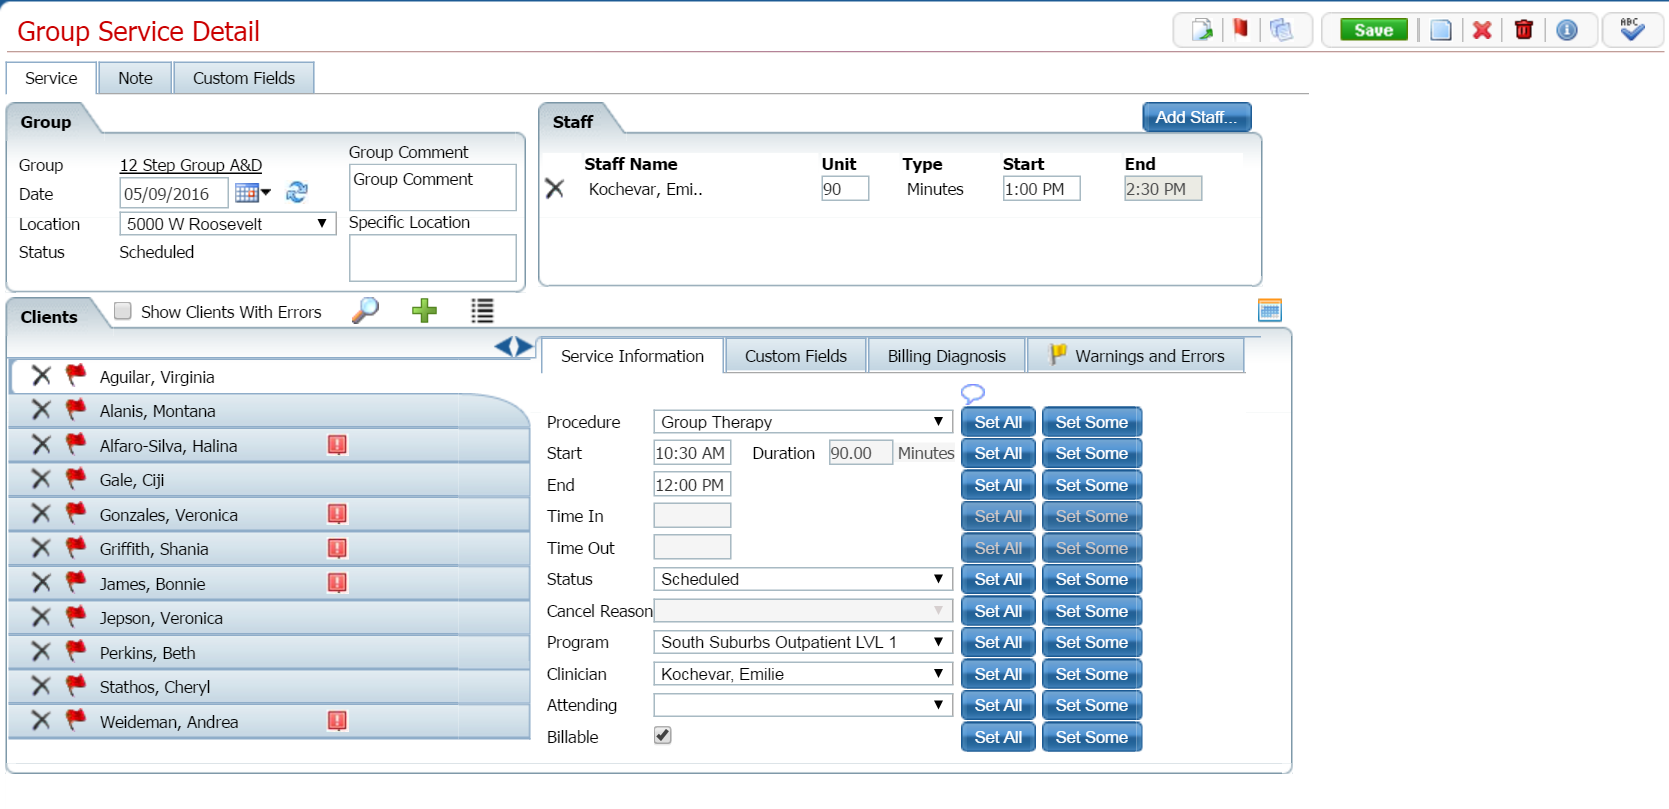
The Group Service Detail page is displayed with the Service tab active showing the information you added in the Group Details page.
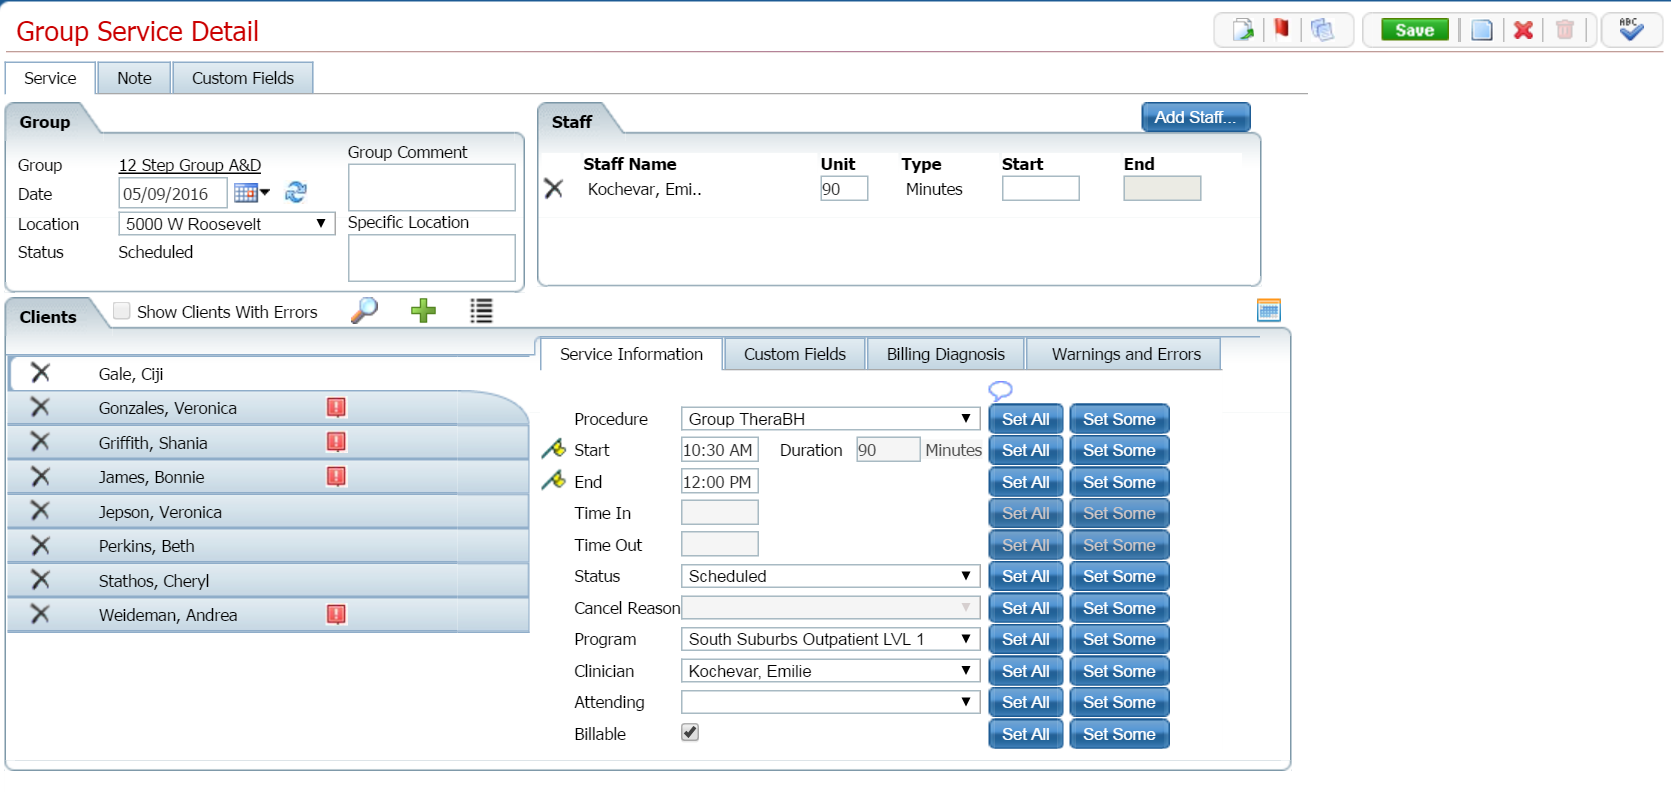
Complete the Service tab. View field definitions.
Click the Save button.
Click the Exit ![]() icon in the task bar to return to the Group Details page.
icon in the task bar to return to the Group Details page.
The Group Details page is displayed with the Schedule tab active showing the Group Service you set up. Note: if you set up the new Group Service with a date in the future, change the date in the filter to view the new group service.
Click the Save button in the task bar.
Click the Exit ![]() icon in the task bar to return to the Groups list page.
icon in the task bar to return to the Groups list page.
Follow this path: My Office > Groups/Day Services > Managing Groups.
The Groups (###) list page is displayed. View field definitions.
Filter the list to determine the records that are displayed. Tell me how...
Click on the hyperlinked group name in the Group column.
The Group Details page is displayed with the General tab active.
Make changes on the General tab, if needed. View field definitions.
Click the Save button in the task bar.
Note: If you selected the Attendance check box when you created the group, the Schedule tab is grayed out. If the Schedule tab is grayed out because you selected the Attendance check box, click on the Schedule button in the Attendance section on the General tab to set up the group service.
Click on the Schedule tab to make it active.
The Schedule tab is displayed. View field definitions.
Click on the hyperinked date in the Date column to change the scheduled group service.
The Group Service Detail page is displayed. View field definitions.
Make changes to the Group Service Details page, if needed.
Click the Save button.
Click the Exit ![]() icon in the task bar to return to the Group Details page.
icon in the task bar to return to the Group Details page.
The Group Details page is displayed with the Schedule tab active with the Group Service you set up showing. Note: if you set up the new Group Service with a date in the future, change the date in the filter to view the new group service.
Click the Save button in the task bar.
Click the Exit ![]() icon in the task bar to return to the Groups list page.
icon in the task bar to return to the Groups list page.
Important: When you have added a Group Service to a Group, you cannot delete the group. Also, it is important to avoid deleting a group that has been used, as this can cause problems throughout the system.
Follow this path: My Office > Groups/Day Services > Managing Groups.
The Groups (###) list page is displayed. View field definitions.
Filter the list to determine the records that are displayed. Tell me how...
Click on the hyperlinked group name in the Group column.
The Group Details page is displayed with the General tab active.
Click the trash can  icon in the task bar to delete the group.
Click the Yes button in the Confirmation Message window.
The Groups (####) list page is displayed.
Why can't I access these screens?